In the ever-evolving world of technology, enhancing productivity often hinges on finding the right tools. One such tool is the Stream Deck, a customizable device that allows users to streamline their workflows with just a tap of a button. But what if you could create your very own Stream Deck using a Raspberry Pi? This DIY project not only showcases the versatility of the Raspberry Pi but also empowers you to tailor a productivity solution that fits your unique needs. In this guide, we will walk you through the steps to transform your Raspberry Pi into a fully functional Stream Deck, enabling you to execute macros, launch applications, and optimize your daily tasks effortlessly.
| Item | Details |
|---|---|
| Project Name | DIY Stream Deck using Raspberry Pi |
| Core Component | Raspberry Pi (recommended: Raspberry Pi 3 or Zero 2) |
| Touchscreen Display | Large enough to accommodate shortcuts and macros |
| OS Requirement | 32-bit Linux distribution (preferably Raspberry Pi OS) |
| Key Components | Raspberry Pi 5, SanDisk 256GB Ultra microSDXC, GeeekPi 7 Inch LCD |
| Raspberry Pi 5 Price | $80 at CanaKit, $89 at Amazon (8GB) |
| SanDisk 256GB Price | $20 at Amazon |
| GeeekPi 7 Inch LCD Price | $50 at Amazon |
| Setup Steps for Stream-Pi Server | 1. Download installer from GitHub. 2. Install and launch Stream-Pi Server. 3. Set Nickname and Port. 4. Allow app through Firewall if needed. |
| Setup Steps for Stream-Pi Client | 1. Open terminal. 2. Install curl (if needed). 3. Use curl command to install client. 4. Reboot and configure connection with server. |
| Result | Macros and shortcuts appear on touchscreen, clickable to execute actions. |
| Default Integrations | OBS and Twitter integrations included in the app. |
The Magic of Stream Decks
Stream Decks are incredible tools that help you work faster and smarter. They allow you to set up customizable buttons that can perform various tasks, like opening your favorite programs or using shortcuts in games. Imagine pressing one button and instantly launching your favorite video editing software! With a Stream Deck, you can make your computer work in a way that feels just right for you.
Whether you’re a gamer, an artist, or just someone who likes to stay organized, a Stream Deck can boost your productivity. For example, artists can set up buttons for their most-used tools in Photoshop, while gamers can use it to switch between game modes quickly. This means you can spend more time doing what you love and less time clicking through menus!
Gathering Your Supplies
To create your own Stream Deck using a Raspberry Pi, you need a few important supplies. First, you need a Raspberry Pi, which is a small computer that can do a lot of cool things. For the best results, it’s recommended to use at least a Raspberry Pi 3, but a Zero 2 can work, too. You’ll also need a touchscreen display that fits your shortcuts nicely, making it easy to tap and use.
Another crucial item is a microSD card. This card stores the Raspberry Pi’s operating system and all your applications. A 256GB card is a good choice to ensure you have enough space for everything. Finally, don’t forget to install a Linux operating system, like Raspberry Pi OS, so your device can run smoothly and connect with all the apps you want to use!
Setting Up the Stream-Pi Server
Before you start using your Raspberry Pi as a Stream Deck, you need to set up the Stream-Pi Server on your computer. This server acts as the main control for your Stream Deck. To do this, head to the official Stream-Pi GitHub page and download the installer file that matches your computer’s operating system. Once downloaded, simply follow the instructions to install it.
After installation, you will launch the Stream-Pi Server application. The first time you open it, you’ll see a Welcome screen. Just click ‘Next’ and agree to the license agreement to continue. You’ll need to assign a nickname and port number for your server. If your computer’s firewall blocks the app, allow it to access your local network so everything can connect properly!
Installing the Stream-Pi Client
Now that your Stream-Pi Server is set up, it’s time to install the Stream-Pi Client on your Raspberry Pi. This is the part that connects your Raspberry Pi to the server. Open the terminal app on your Raspberry Pi, and you might need to install the curl utility if it’s not already there. This utility helps you download the installation script easily.
To install the Stream-Pi Client, you just need to enter a simple command in the terminal. The command will download and set up everything for you. After the installation is finished, reboot your Raspberry Pi. When it restarts, you can launch the Stream-Pi Client app, enter the nickname and server information you set up earlier, and connect everything together!
Customizing Your Stream Deck
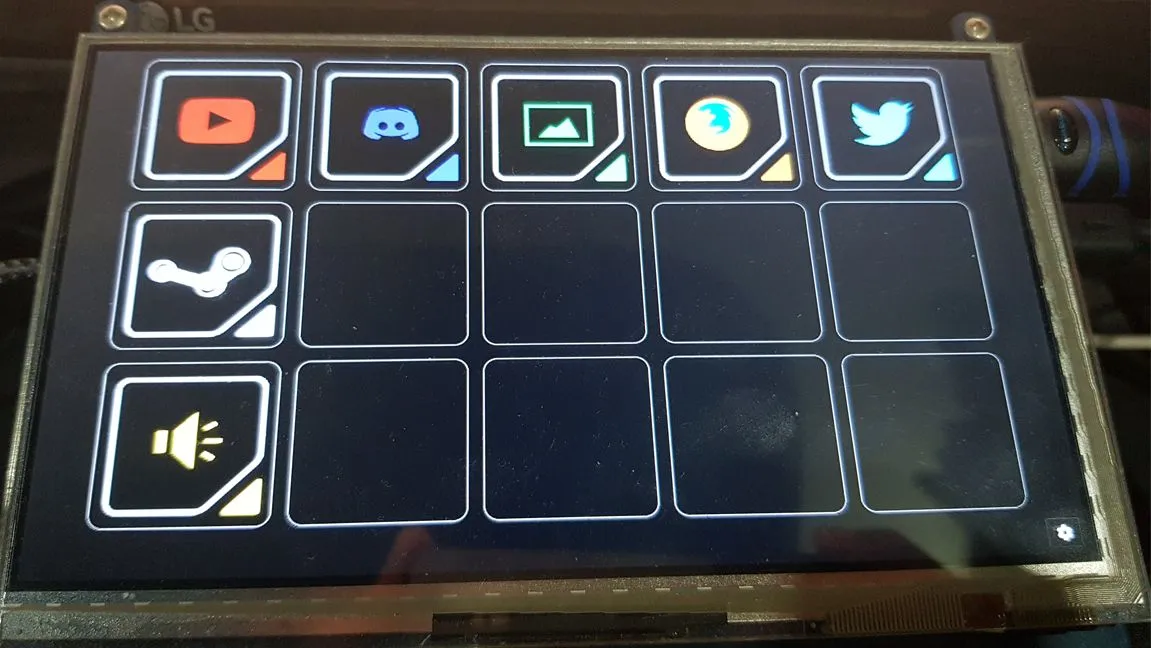
Once you’ve connected the Stream-Pi Client and Server, you can start customizing your Stream Deck! Your touchscreen will show all the macros and shortcuts that you can use. By tapping these buttons, you can perform the actions you’ve set up, which makes your workflow much easier. It’s like having a magical remote control for your computer!
The Stream-Pi Server comes with helpful integrations, like for OBS and Twitter, right out of the box. This means you can quickly set up your Stream Deck to work with popular apps. Plus, you can create custom commands for other applications to make your Stream Deck truly unique to your needs. The possibilities are endless!
Frequently Asked Questions
What is a Stream Deck and how can it help me?
A Stream Deck is a customizable device with buttons that can launch apps, record actions, and manage shortcuts, boosting your productivity in tasks like gaming or video editing.
Do I need a Raspberry Pi to create a DIY Stream Deck?
Yes, a Raspberry Pi is essential for building a DIY Stream Deck. A Raspberry Pi 3 or Zero 2 is recommended for this project.
What materials do I need to build a Stream Deck with Raspberry Pi?
You’ll need a Raspberry Pi, a touchscreen display, and an operating system installed on the Pi, along with the Stream-Pi Server and Client software.
How do I set up the Stream-Pi Server on my PC?
Download the Stream-Pi Server from GitHub, install it, and configure a nickname and port number. Ensure your firewall allows the app to access the network.
How can I install the Stream-Pi Client on my Raspberry Pi?
Use the terminal to run a simple curl command to install the Stream-Pi Client. After installation, reboot your Pi to complete the setup.
What can I do with my Raspberry Pi Stream Deck?
You can assign macros, launch applications, and control OBS or Twitter directly from your touchscreen display, making tasks easier and faster.
Is there support for custom applications with the DIY Stream Deck?
Yes, you can use the Hotkeys option in the Stream-Pi Server to customize your Stream Deck for various applications beyond the built-in integrations.
Summary
You can transform your Raspberry Pi into a DIY Stream Deck, a powerful tool for boosting productivity. This project requires a Raspberry Pi (preferably a Raspberry Pi 3 or Zero 2) and a touchscreen display. You’ll also need to set up the Stream-Pi Server on your PC and install the Stream-Pi Client on your Raspberry Pi. Once configured, your touchscreen will display customizable buttons for quick access to apps and shortcuts. With built-in integrations for software like OBS and Twitter, your new Stream Deck can streamline your tasks and enhance your workflow!